Sunday, November 20, 2011

Breadsticks


 One of my favorite things to compliment my meals are Homemade Breadsticks!  I actually got the recipe from Lisa, which she got it from her SIL, Karey!  These breadsticks are EASY!  Yes, you're using yeast, so there are a couple of rise times.  But, because they are so easy, it's not a big deal to just have them rising while you prepare other parts of your meal! I ALWAYS get complemented when I make these and take them somewhere.  They are especially a hit in the fall, when I make them with soups!  I often make them on the nights we do Homemade Pizza too! To start mix together 1 1/2 cups warm water, 1 tablespoon yeast and 2 tablespoons sugar.  You will need to let that sit for 5 minutes while the yeast activates and
becomes frothy.

 
This is what it will look like when you first put the yeast in the water and it is beginning to froth!
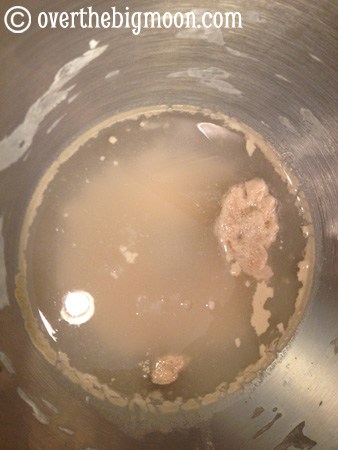

I left to change the laundry and came back to this!  The yeast will all be wet and the yeast left on top of the water will be frothy!

You'll then add 1 teaspoon salt and 4 cups of flour!  I add 2 cups, mix, add another cup, mix and then add the last couple and mix it!  The dough should pull away from the sides of the bowl and not be sticky.


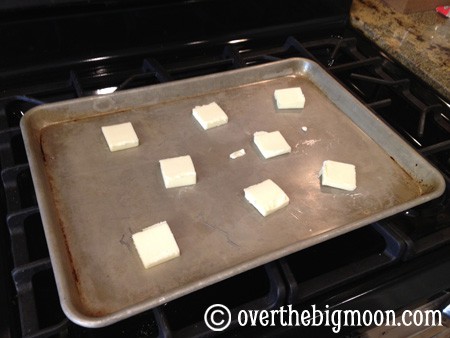
 Then I spray the inside of plastic bowl with cooking spray and put the dough ball in it and cover.  Let it rise for 15-20 minutes!  While it is rising I get the oven heating up at 375 F.  I also cut up 1 cube of butter and arrange it on my sheet pan and put it in the oven to melt.

Once it has risen, I spray the counter top with cooking spray and kneed it down a bit.  You could also flour your countertop if you prefer, but I generally don't prefer that method.  I don't want to chance my dough getting dry.  Then I roll the dough out to just barely smaller then the pan I'm going to use.
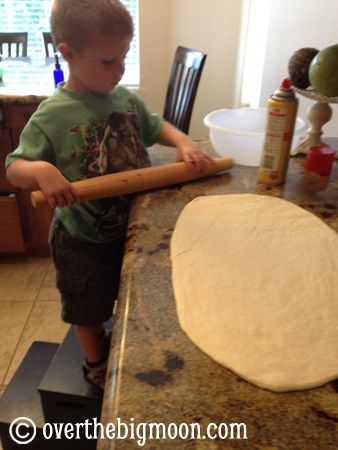
   

As you can see, Nathan was my little helper this particular day.  He loves to help me run the mixer and cut up the breadsticks!
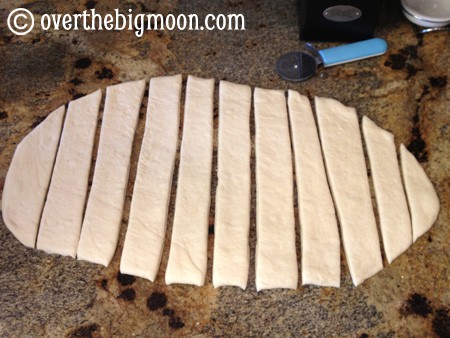
   

 Once it is rolled out to the approx size of my pan, I take a pizza cutter and cut it in breadsticks.  The pan should be all ready with the butter melted - then I take the breadsticks and place them onto the pan.
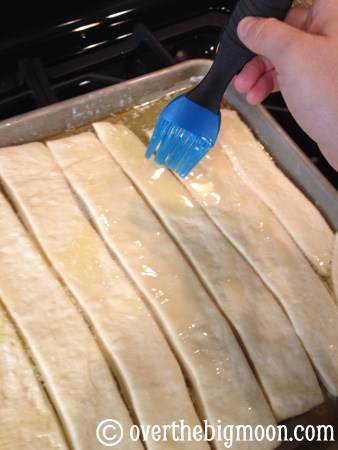
   

 I then take my basting brush (which I LOVE) and brush the butter all over the breadsticks!  I also top them with Garlic Powder and Parmesan Cheese.
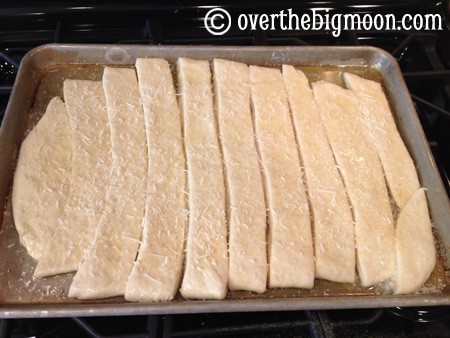
 

Then walk away and let them rise another 15-20 minutes!
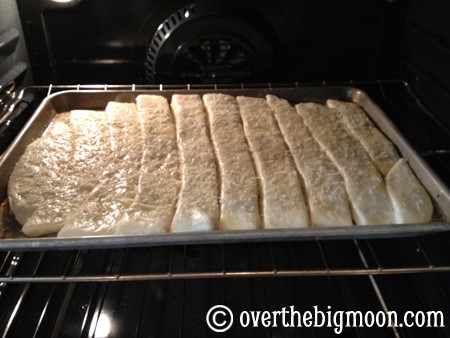

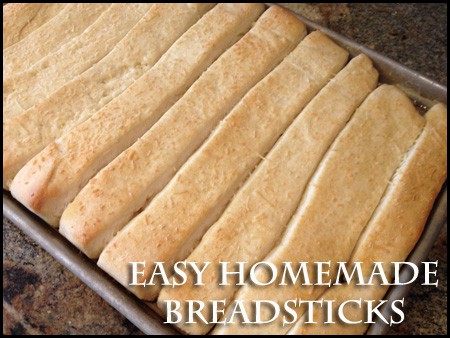
Then bake at 375 for 15-18 minutes, or until golden brown on their tops and edges. Here's what mine looked liked going in the oven!  BIG and fluffy!!
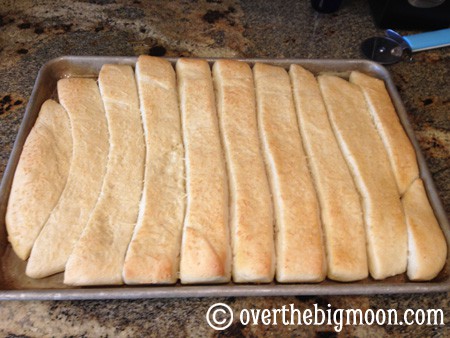

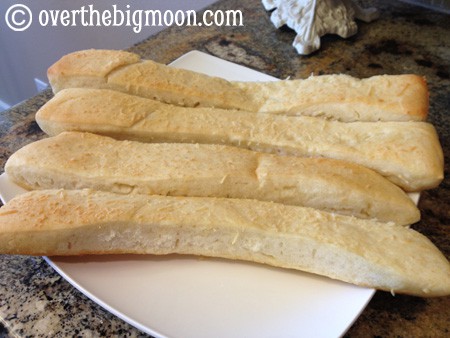
And, here's what they look like fresh out of the oven!

GOOD LUCK and ENJOY!

Here is the recipe:

Mix together: 1 1/2 c warm water 1 tbsp yeast 2 tbsp sugar Let sit for about 5 minutes (or until it becomes frothy).

Add and mix together: 1 tsp salt 4 c flour, enough so that the dough pulls away from the sides of the mixer and is not super sticky Let the dough rise for 15-20 minutes.

Melt 1 cube of butter in a 11x13 jelly roll pan in the oven. Shape the dough into bread sticks and place on pan. I rolled mine out on the counter to just a little bit smaller than my jellyroll pan and then cut them into nice bread stick shapes with my pizza cutter. Just be sure before you cut them that you have either putting cooking spray on the counter or you have enough flour on the bottom side, so they don't stick to your counters. Sprinkle with garlic powder and with grated Parmesan cheese.

I left just a little bit of room between my bread sticks and the butter came up over them as I was placing them in pan. Let rise for about 20 minutes. Bake at 375 for 15-18 minutes, or until golden brown on top and edges.

Thursday, October 13, 2011

Wisconsin Cauliflower Soup


I got this recipe from the girls at You Heard It Last!  It was seriously YUMMY!  I made a double batch and froze future meals!  For sure try this one!

Yields: 9 cups 

2 tablespoons butter (1/4 stick)
1 medium onion, chopped
1/4 cup all-purpose flour
1/2 teaspoon salt
2 cups milk
1 can (13 3/4 to 14 1/2 ounces) chicken broth
1 head (2 1/2 pounds) cauliflower, cut into 1-inch pieces
1 teaspoon Dijon mustard
1 cup shredded cheddar cheese
1 cup pepper jack cheese

In 4-quart saucepan, butter over medium heat. Add onion and cook until golden, about 10 minutes, stirring occasionally. Stir in flour and salt; cook 2minutes, stirring frequently. Gradually stir in milk, chicken broth, and 1 1/2 cups water; add cauliflower and heat to boiling over high heat. Reduce heat to low; cover and simmer until cauliflower is tender, about 10 minutes. In blender (with center part of blender cover removed to allow steam to escape), blend cauliflower mixture at low speed in small batches until very smooth. Return cauliflower mixture to saucepan; heat over medium heat until hot, stirring occasionally. Remove saucepan from heat; stir in mustard and 1 1/2 cups cheese until melted and smooth. Garnish soup with remaining cheese to serve.

Saturday, September 24, 2011

French Chicken


There are two ways to make this - in the oven or via crockpot. I generally do it in the crockpot on days that I have busier afternoon/evenings!

6 regular sized Chicken Breasts
Can of Cranberry Sauce (I like mixed berry)
1 packet of Lipton Onion Soup Mix
8 oz of French Dressing

Oven:

Mix
1 Can of Cranberry Sauce, the Lipton Onion Soup Mix and 8 oz of French Dressing.  Grease a baking pan, lay out the chicken breasts and pour over the mixure over the chicken.

Bake at 350 for 1 1/2 hours!

Crockpot:

I generally start it around lunch time - noonish or so.  I put the chicken in frozen, add all the other ingredients and start it on high for the first hour or two.  That is mainly to help the chicken thaw!  Then I turn it to low until it's time to eat!  We eat around 6:00 usually.  The chicken has always been good - never dry!

I serve it with rice and a veggie or a green salad!  We call it Candy Chicken to the kids and they totally believe us!  It's that good!  Seriously delish!

Enjoy!

Sunday, September 4, 2011

Beef Enchiladas


Thanks to my friend, Lisa, for actually taking the time to Google and learn how to cook a Chuck Roast properly.  We have freezers full of meat thanks to my dad.  We always have a lot of Chuck Roasts and it is always the roast that we kinda don't know what to do with it.  Thanks to Lisa, I will no longer have a problem coming up with things do cook with them. Because Chuck Roasts have lots of fat in them you have to cook it on LOW in a Crockpot for 10-12 hours.  It DOES NOT dry out.  It takes that long for the fat layers to all melt down and it helps the roast have a great flavor.

So, here's what I did:  I put a Chuck Roast into my crock pot and dumped 2 cans of Beef Broth, 1 can of water, a Fajita packet and a Au Jus packet in with it and cooked the Chuck Roast on LOW overnight.  It ended up cooking about 11 hours.  At the end of the 11 hours it literally was FALLING APART!  All I had to do was take the fork and smash it and it was shredding itself.  BEAUTY I tell you!

I used half the meat to make these Beef Enchiladas and saved the other part of the meet and the juice and we had Au Jus sandwiches the next night.!

I don't love super traditional red sauce, so I came up with this little version:

1 packet McCormick Enchilada Sauce
1/3 cup sour cream
1/3 cup heavy whipping cream

Sauce before adding Sour Cream and Whipping Cream

Sauce after adding Sour Cream and Whipping cream

Then you can make up the enchiladas however you want... here are some things you can add into your meat:
Sautéed Onions
Green Chiles
Peppers

My husband doesn't like very much in his enchiladas, so I generally make them quite plain and do everything as toppings.

All I do for the inside is lay out a tortilla, put the meat, in the middle, sprinkle some cheese and approx 1 tablespoon of the sauce.  Then I roll them up.  If it was just up to me I would add sauteed onions and some green chili's to the meat too.  You could also layer the olives, beans, and rice here too. I always coat the pan with some cooking spray and like 1/2 cup of sauce and then lay them in the pan.  After the pan is full I cover all the Enchiladas with plenty of sauce and sprinkle the cheese on!


Cook on 350 for 20 or so minutes.  Make sure the cheese has melted.  Serve with whatever toppings you and your family like (lettuce, sour cream, rice, beans, etc)!  ENJOY!


Here is the extra half of the meet all read for Au Jus sandwiches the following night!  Yummy!


Wednesday, August 3, 2011

15 minute Creamy Avocado Pasta


I got this recipe from Oh She Glows!  There are awesome step-by-step pictures on her blog post! 

Yield: Serves 2

Ingredients:
1 medium sized ripe Avocado, pitted
1/2 lemon, juiced + lemon zest to garnish
2-3 garlic cloves, to taste (I used 3 and it was quite garlicky, but if you are not a big fan of garlic use 1 clove)
1/2 tsp kosher salt, or to taste
~1/4 cup Fresh Basil, (probably optional)
2 tbsp extra virgin olive oil
2 servings/6 oz of your choice of pasta (I used 3oz of spelt and 3 oz of Kamut spaghetti)
Freshly ground black pepper, to taste

    Directions:
    1. Bring several cups of water to a boil in a medium sized pot. Add in your pasta, reduce heat to medium, and cook until Al Dente, about 8-10 minutes.
    2. Meanwhile, make the sauce by placing the garlic cloves, lemon juice, and olive oil into a food processor. Process until smooth. Now add in the pitted avocado, basil, and salt. Process until smooth and creamy.
    3. When pasta is done cooking, drain and rinse in a strainer and place pasta into a large bowl. Pour on sauce and toss until fully combined. Garnish with lemon zest and black pepper. Serve immediately. 
    Serve noodles plain or I think it would be great with a Grilled Chicken or Shrimp
    Makes 2 servings.
    Please note: This dish does not reheat well due to the avocado in the sauce. Please serve immediately.  However, I did have some extra sauce and put it in a container and it did store well for over a day in my fridge without browning (I'm assuming cause of the lemon in it).  So, I do believe if you cooked new noodles and then added the cold sauce to the noodles it would be fine.  
    Let me know if anyone tries it!.

    Sunday, July 31, 2011

    Fiesta Chicken Enchiladas

    I got this recipe from my friend, Brenda's, cooking blog.  I changed a few minor things.  This was seriously good!  I loved the little kick that it brought with each bite!  Thanks Brenda and enjoy everybody!  


    I totally forgot to snap pictures, but you can click over to Brenda's site to see her pictures!  I'll take some next time I make them and add pictures!


    *Note:  I like a lot of sauce, so I generally 1 1/2 times the topping recipe.


    Fiesta Chicken Enchiladas

    2-4 large boneless skinless chicken breasts
    1 packet Fiesta Ranch dip (by the Hidden Valley Ranch packets), divided
    2-3 tbs butter, melted
    1 small can green chilies ( I didn't use the whole thing)
    1/2 - 1 onion, finely chopped (to preference)
    1 garlic clove, minced
    1 cup Monterrey Jack Cheese, divided
    1/2 cup Sharp Cheddar Cheese
    1 can green enchilada sauce
    1/3 cup half and half or heavy whipping cream
    8-10 tortillas
    sour cream (optional)

    Chicken:
    Mix melted butter with 1/2-3/4 fiesta ranch dip packet.  Pour over chicken in crock-pot.  Cook on low for 6-8 hours or on high for 3-4 hours.  Shred chicken.  Save the extra butter/fiesta ranch mixture.  


    Filling: 

    In a small pan, saute onion and garlic for 1 minute, until fragrant.  Add green chilies and warm.  Add reserved butter/fiesta ranch mixture you used to cook the chicken in..  It will look a little runny, but turn the stove to medium-high heat and add the shredded chicken.   


    Topping:
    Mix green enchilada sauce and half and half in same pan used to saute onion to grab the remaining bits of flavor.  


    Assembly:
    Poor about 1/4 cup of the topping onto the bottom of the greased pan.


    Pour a tablespoon of topping into the center of the tortilla.  Add chicken filling, then sprinkle on some cheese and roll up.  Put open side down in the pan to hold the roll.  Repeat.


    Pour remaining topping over enchiladas.  Sprinkle with Cheddar and rest of the Monterrey Jack Cheese.

    Bake at 350 degrees for 20 minutes or until cheese is melted and sauce is bubbling.  To get a slightly crisp and browned top, broil for 3-4 more minutes; watch carefully so it doesn't burn.  

    Sour cream topping:
    1/4-1/2 cup sour cream
    1/4 cup fiesta ranch packet


    Sprinkle sour cream with fiesta ranch packet.  Keep tasting and adding to get it as strong of a flavor as you like. Refrigerate until ready to serve. Serve on top of enchiladas.

    Thursday, July 28, 2011

    Brazilian Lemonade

    My friend, Lisa, made this for us when we had a BBQ a couple weeks ago.  It seems like it would be too sweet but its actually really refreshing. You will not regret trying this!

    5 limes
    6 cups water
    1 c sugar
    6 Tbsp sweet and condensed milk


    Juice limes and lightly zest skins into juice. (Most recipes have you grind the entire lime but Lisa was told that it made the batch bitter as time went on. With juicing and only using the zest it does not get bitter).

    Mix with water and sugar. Right before serving stir in sweet condensed milk. Serve over ice.